gfxgfx
 
logo
 
gfx gfx
gfx
975755 Posts in 138933 Topics by 6360 Members - Latest Member: TattooedYorkie September 21, 2024, 08:44 AM
*
gfx* Home | Portal | Forum | Merchandise | Help | Login | Register | gfx
gfx
RADBMX.CO.UK  |  Technical & Reference Section  |  Tech and Restoration  |  JMC DY FINALY FINISHED
gfx
gfxgfx
 

Author Topic: JMC DY FINALY FINISHED  (Read 12829 times)

0 Members and 1 Guest are viewing this topic.

baldbmxer

  • Guest
JMC DY FINALY FINISHED
« on: May 27, 2010, 05:14 PM »
I'm sure you'll remember the JMC DY that I rescued from a damp cold cellar a few years ago. Well its been a long restoration but finally its done and looking quite different from when I first got it!

In restos like this I know that I'm really just the project manager. Bringing in the specialists when needed, sourcing the parts, bolting it together and making it look pretty. The hard work has been done by others. Firstly Mr Phillip Rowles - aka 'SAWZAL' for the metal work and man hours he put in bringing the rotten frame back to life. Secondly Trevor at Midas Touch for the rechroming of the forks and bars and thirdly a good friend of mine Mr John Robinson for the paint work. It really is a treat.

So back to the start.............

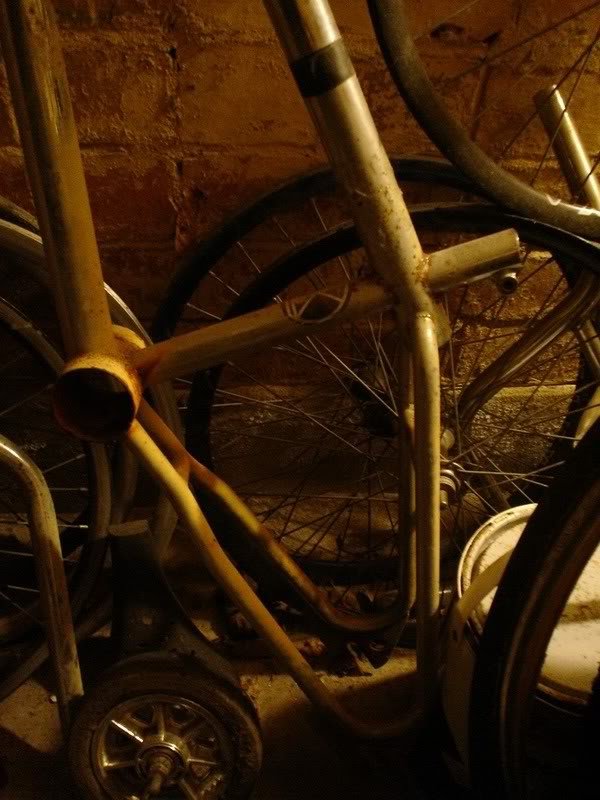
I found this JMC DY frame with Bottema Race Forks in an old friends dark damp cellar. It was resting on its rear drop outs  with the forks against the wall above a ventilation grate. The ventilation grate was letting in a supply of damp air in across the f&f causing a fan of rust and corrosion across the down tube to the seat tube, top tube, bottom bracket and both seat and chainstays. It was a dirty mess for sure.

As I found it in the cellar


and out in the fresh air


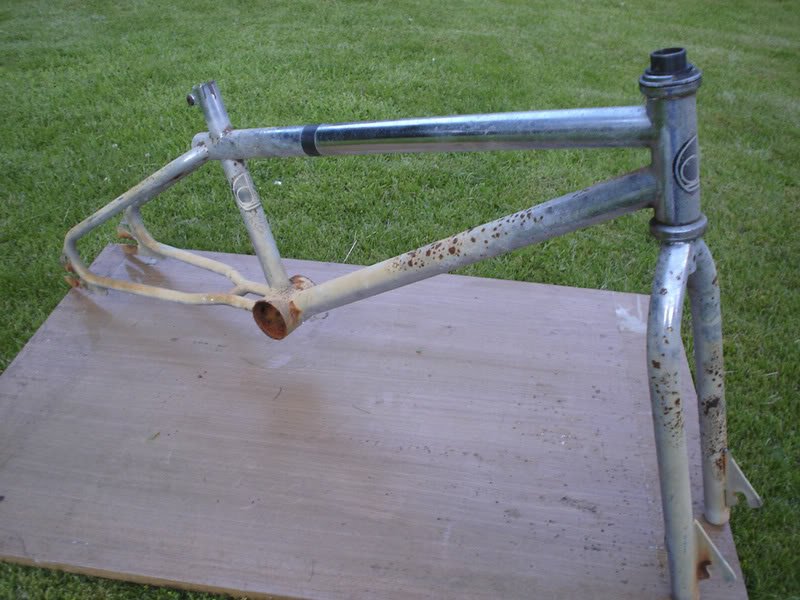
it cleaned up a little better though


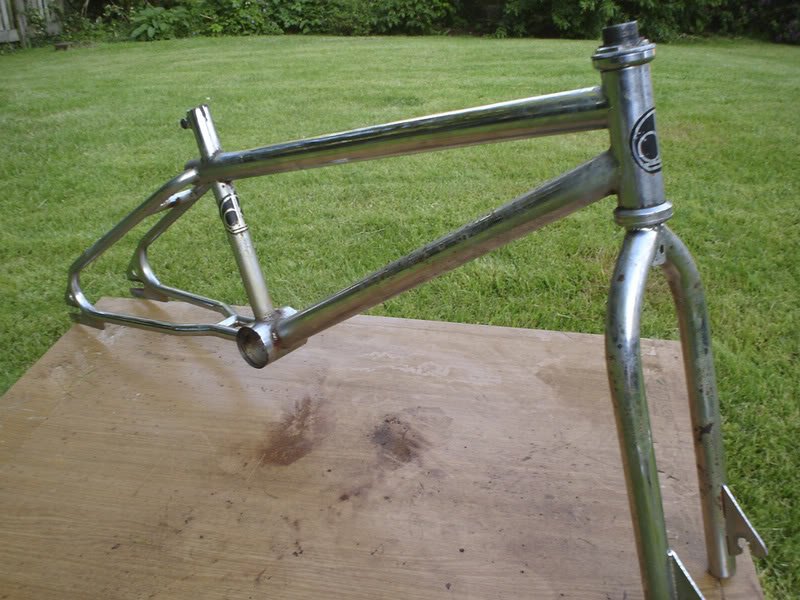
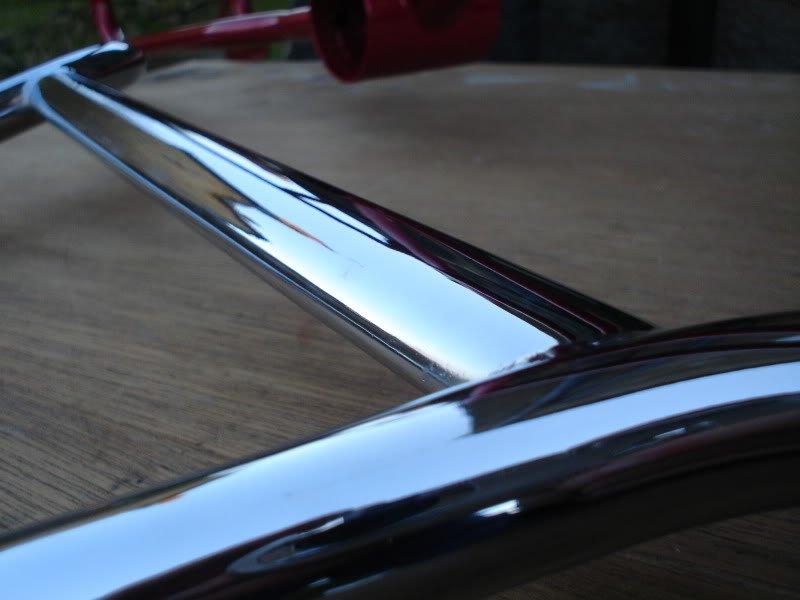
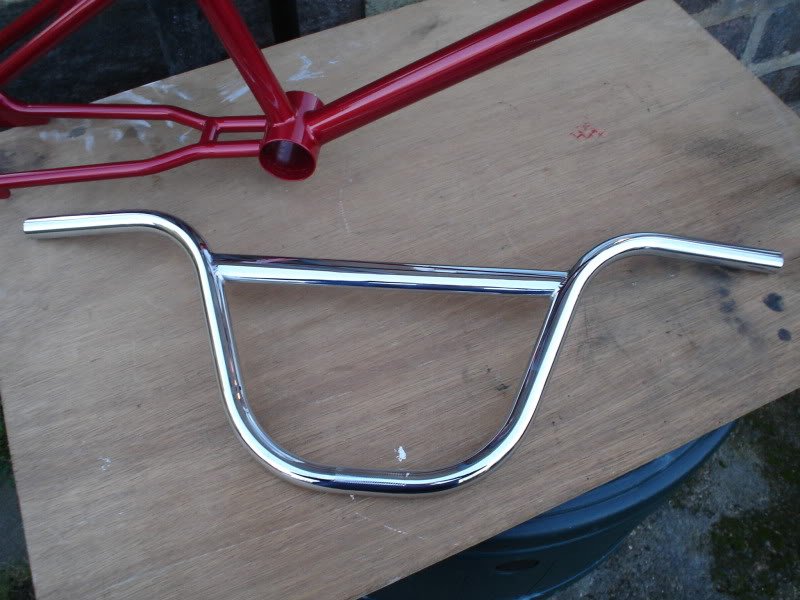
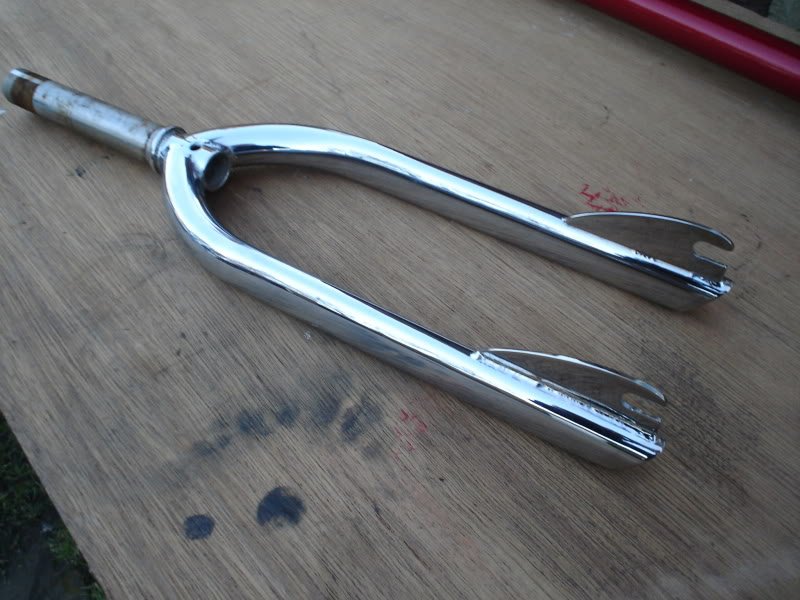
I was quite happy to keep it in its survivor condition but when I got lucky on a GT on eBay with DY forks and bars for peanuts the wheels started moving for the restoration. The bars and forks were not in great condition but nearly as bad as the frame. So the frame went to stripped, having the chroming process reversed. The forks and bars were stripped, polished and refinished.

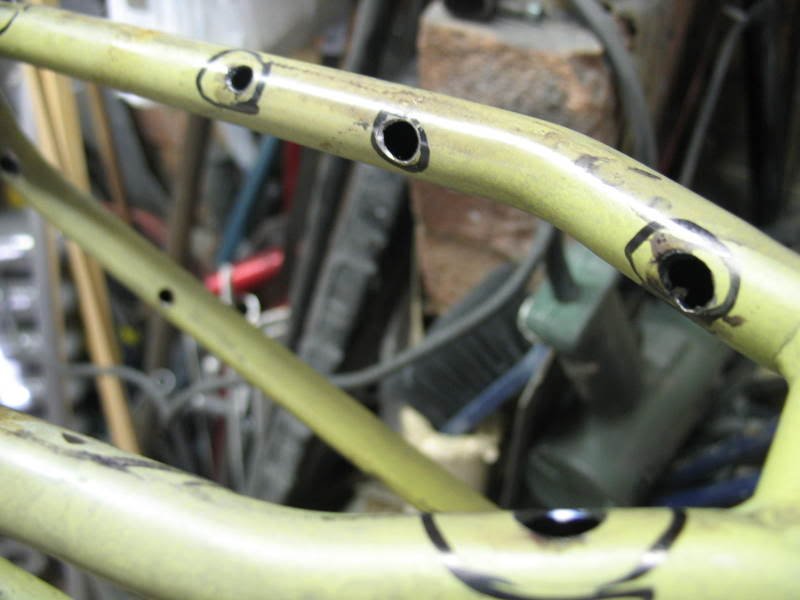
When the frame came back from being stripped it looked better without the rust for sure, but the time in the cellar had really taken its toll on the frame. With the damp air coming in over the frame it must have caused the metal tubes to 'sweat', with a build up of damp inside the frame it must have been rotting from the inside. The loopy rear end really took it badly. The loops must have acted like a 'U' bend on the toilet and held the moisture because it was littered with small holes in the tubing and the welds on the drop outs. Holes were found in the seat stays, chain stays and the odd on in the top tube.

The first thing that Phil Sawzal did was to make a bath and submerge the frame in Hammerite rust eater. After a soaking in the bath the frame was jet washed thoughly, getting plenty of water running through the tubes and flushing them out before baking it to dry it out thoroughly.


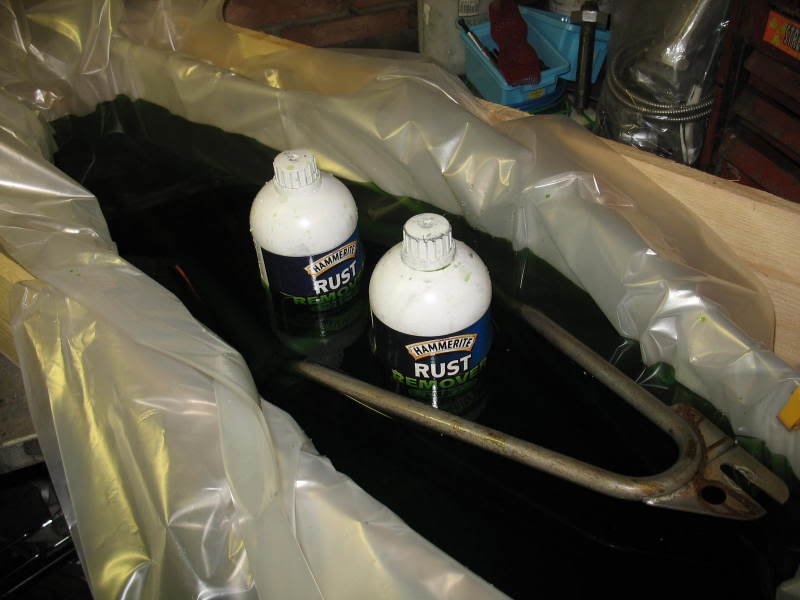
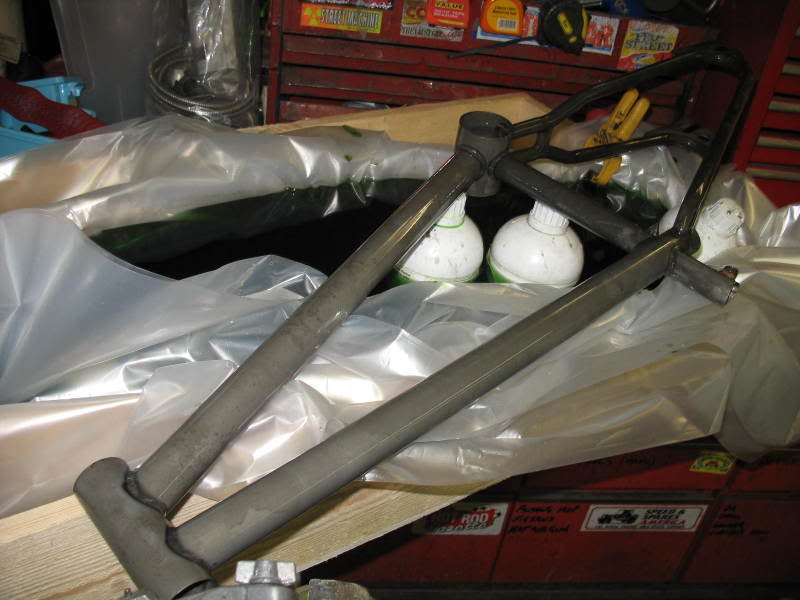
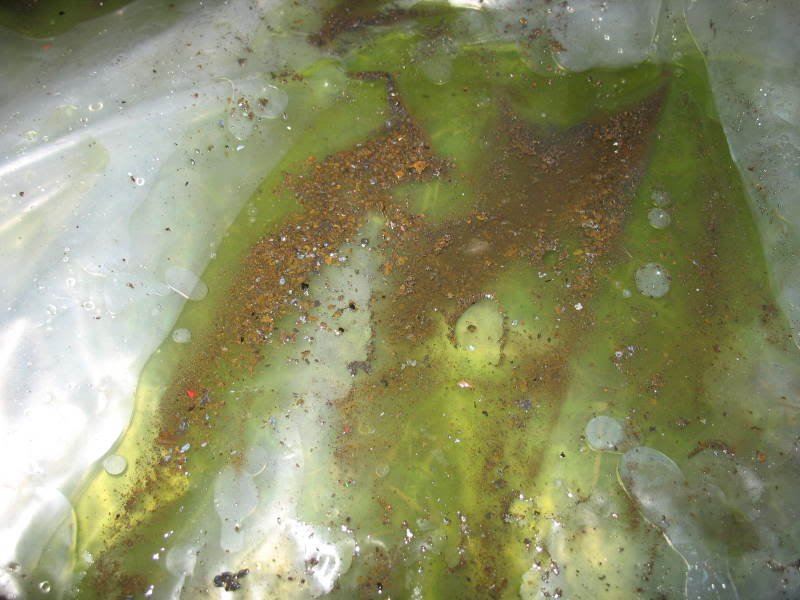
When the rust eater was drained from the bath quite a bit of rust and crap was left behind. It was going to be a gamble as to whether or not the tubes would have any thickness in them to weld to.


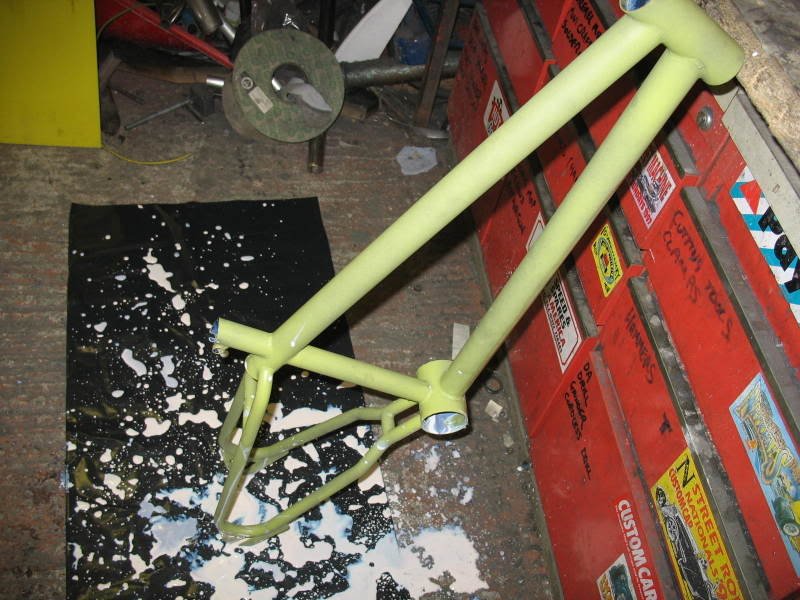
A coat of primer was applied before flooding the frame with some rust neutralizer.


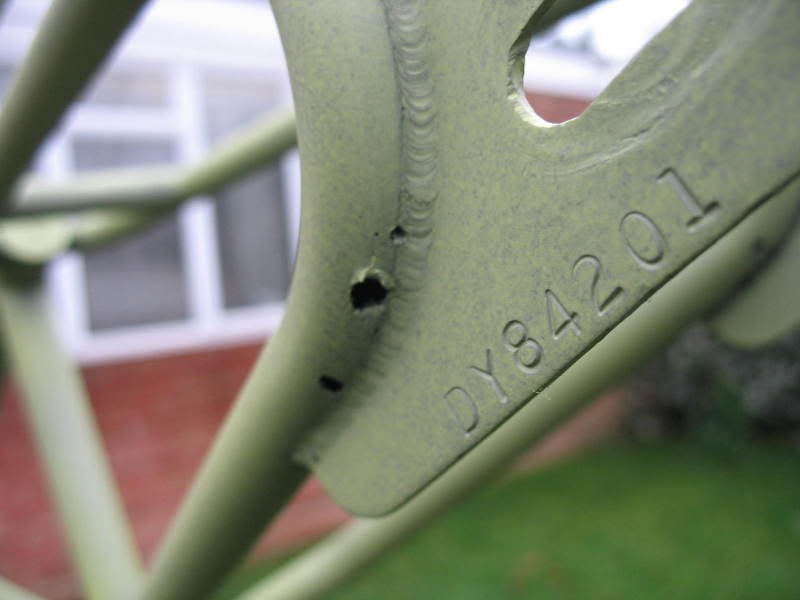
Some of the holes can be seen in the following images.


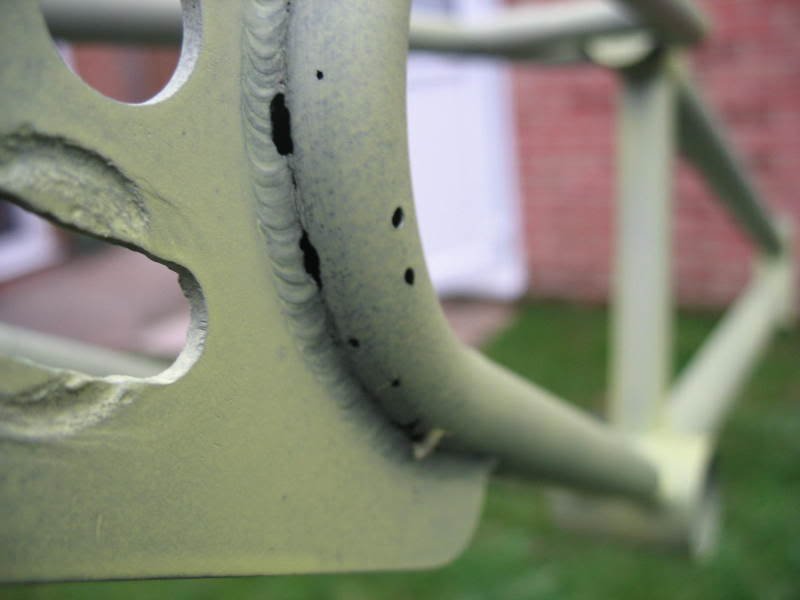
The problem areas where highlighted and carefully drilled out to remove any further rot around the hole. This would leave Phil something weldable!


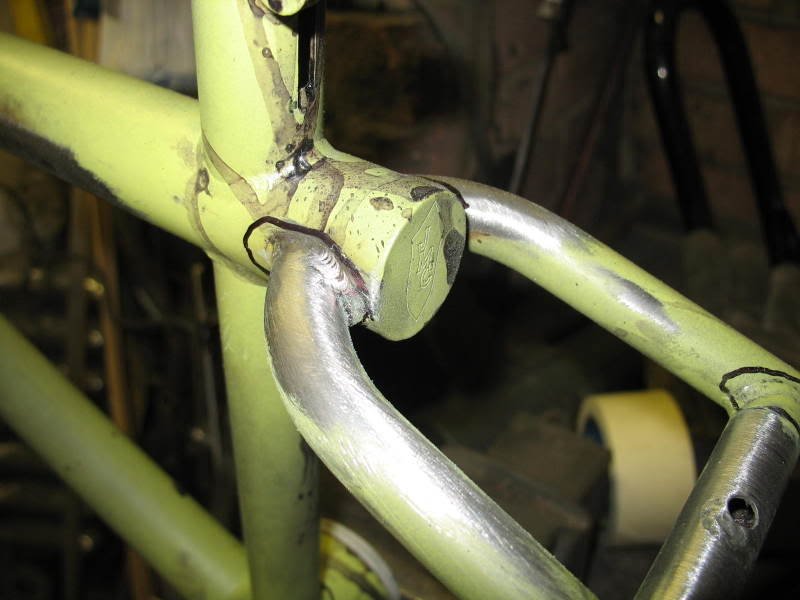
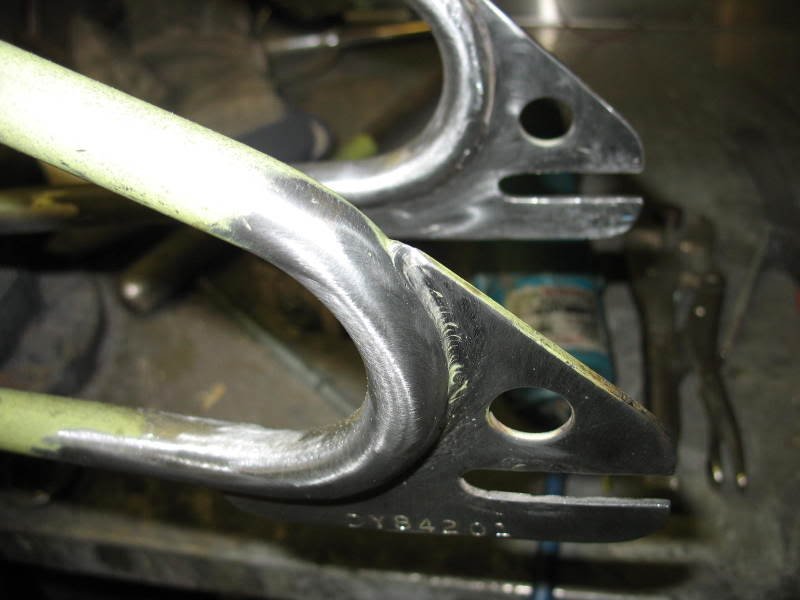
Using a both welding and plating methods Phil dug deep with his patiance and lucking the frame didnt fall apart. Some smoothing and building up of some weld brought the frame back to something like it should be.


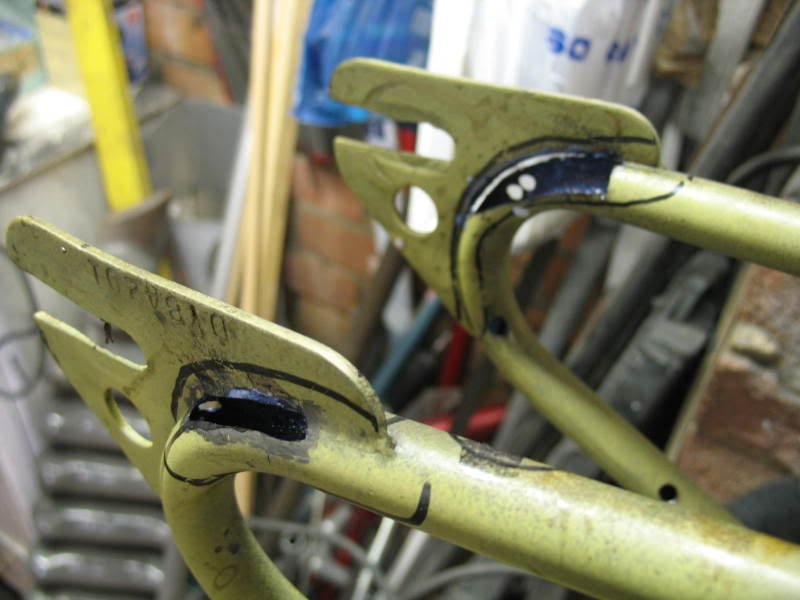
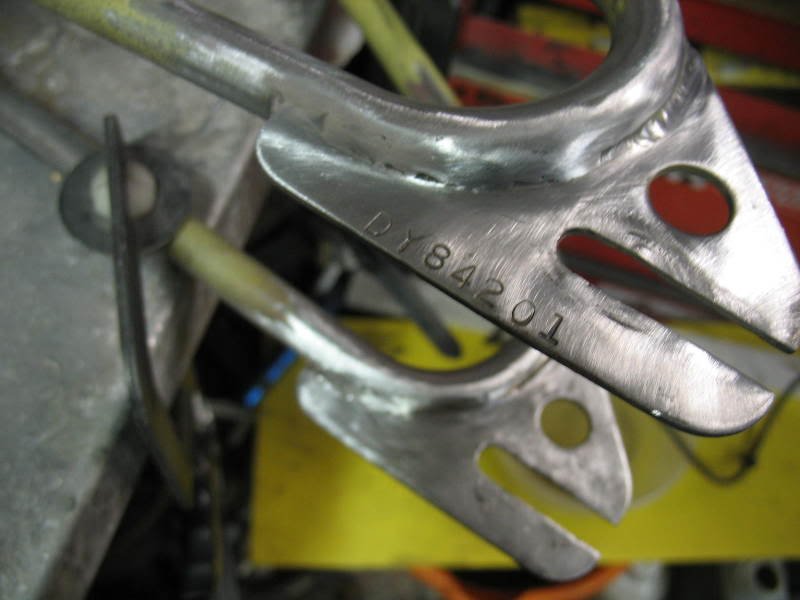
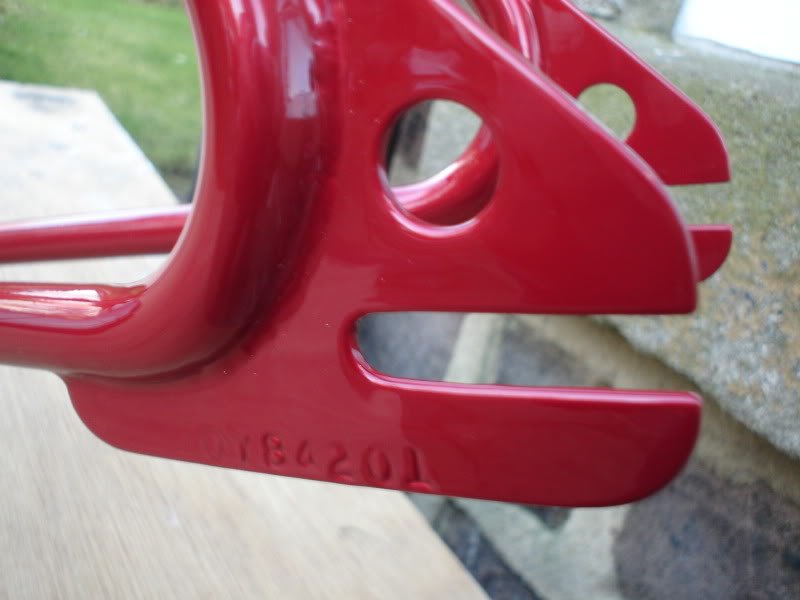
The drop outs were welded, shaped and flatted back, carefully retaining the serial number.


Phil popped the frame back in the post to me without warning. What a great suprise  ;)

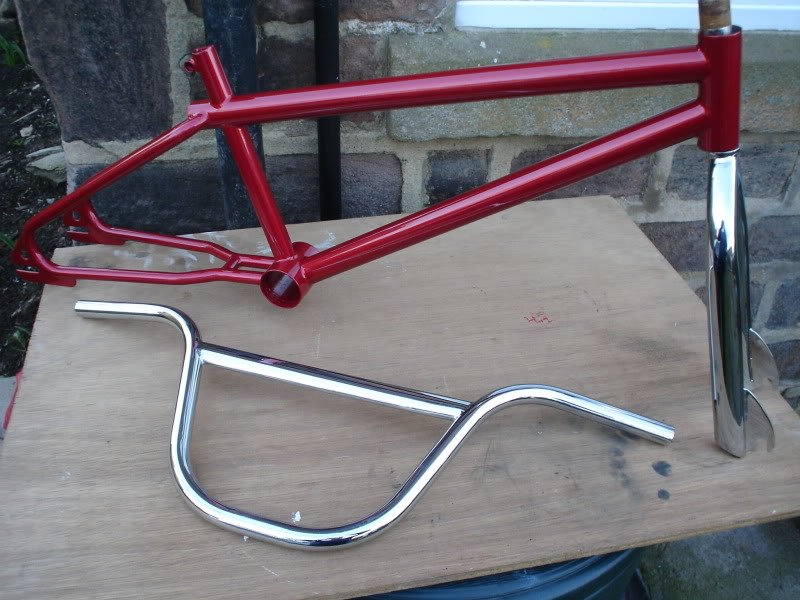
The forks and bars had already been refinished and it was starting to take shape.


In May 2009 my good friend John Robinson offered to paint the frame if I supplied the paint. Obviously I jumped at the chance - cant beat a freebie! Cheers mate. Gotta say thats to SBD for his online and telephone advice and colour samples. The paint was picked after trawling through many swatches and the frame was dropped off at John's workshop.

Whilst in California in June 2009 I contacted Jim Melton  and he sent the decals to me at my friends house in Huntington Beach.

Things went quiet for a while, John had got very busy at work and couldnt find the time to get it painted. There was no rush. Moving onto February 2010 John turned up at the North region Winter regional race with a very shiney looking frame under his arm.............. WOW! I was speech less. I still need to get John some beers!


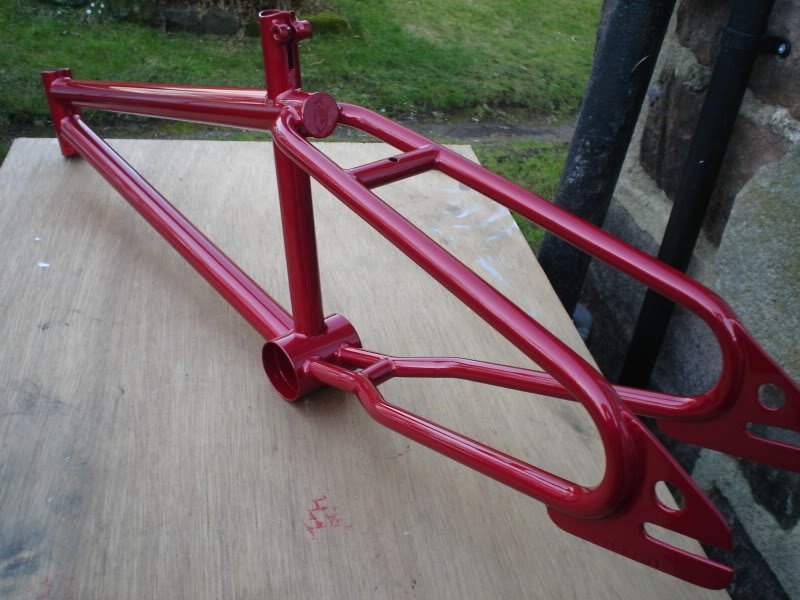
I always said that I wasnt going to go out of my way to source new parts for this build, only use what I had stock piled in the vaults. That of course went out of the window! Haha. Since getting the frame back from John the decals have been applied and many parts offered to the progressing build.

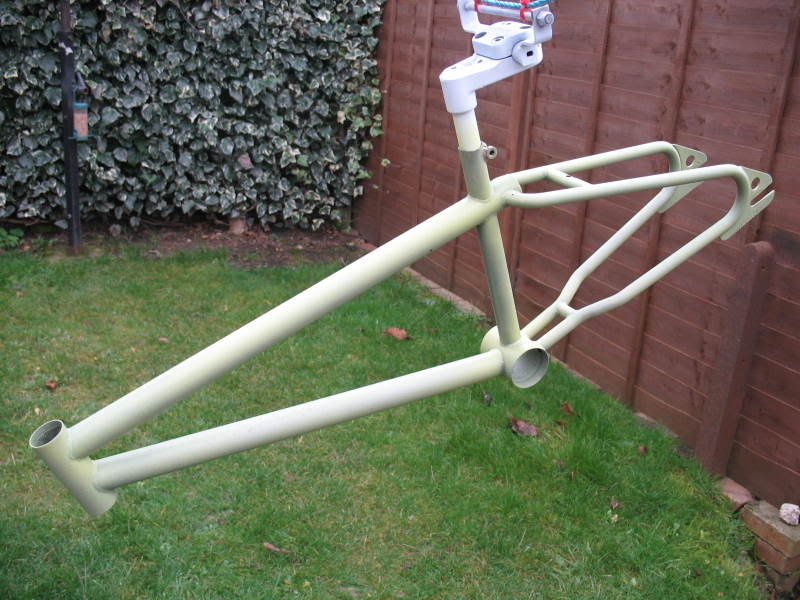
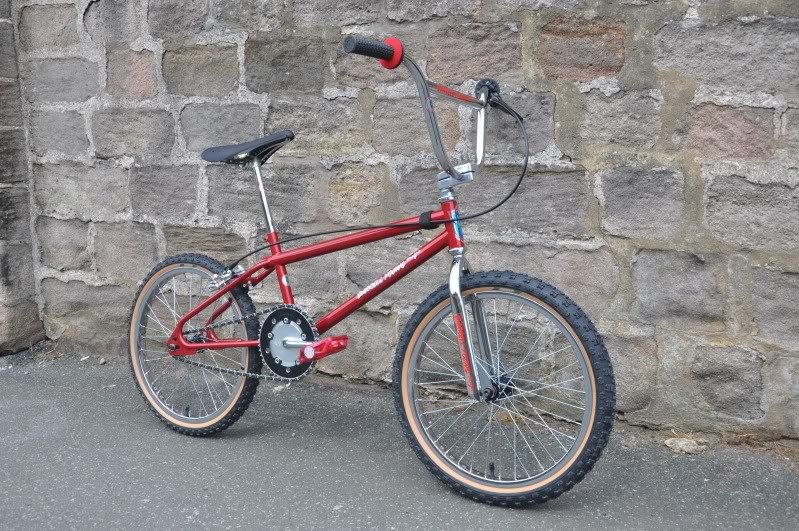
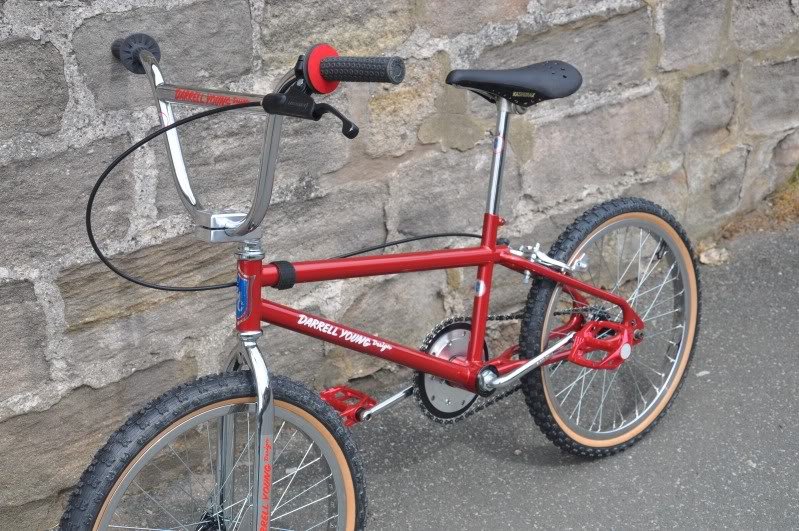
Here's the finshed result, hope you like, let me know what you think  ;)


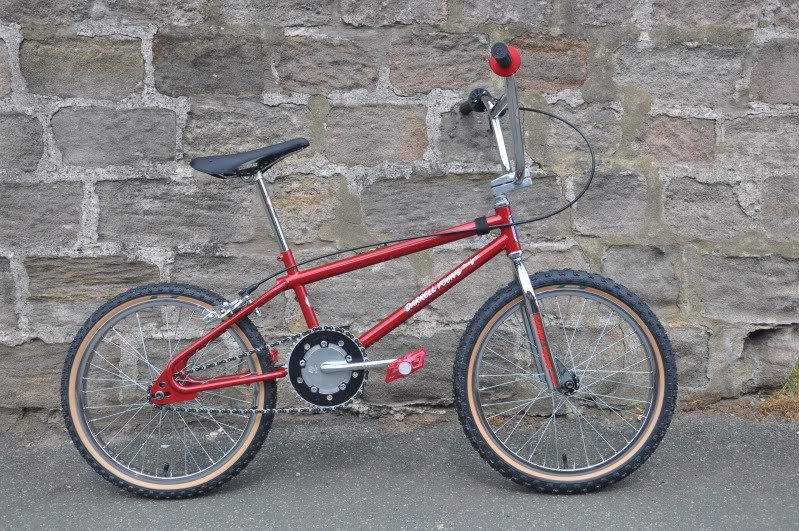
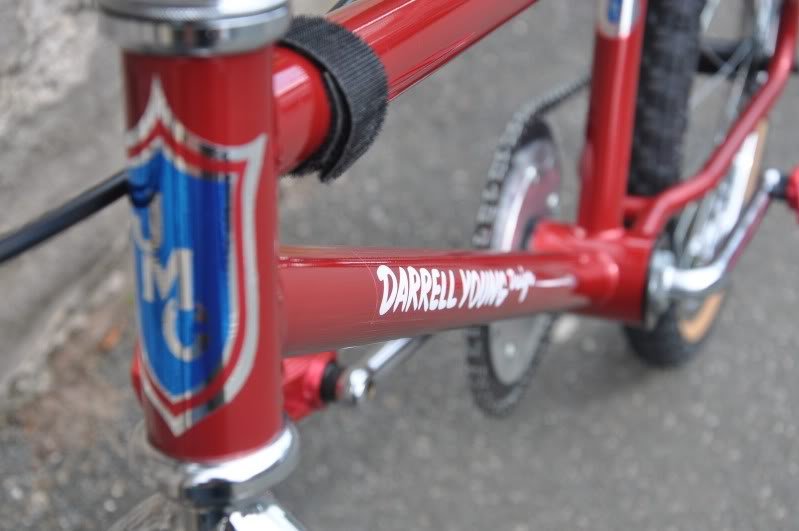
Frame - JMC Darrell Young  - Restored
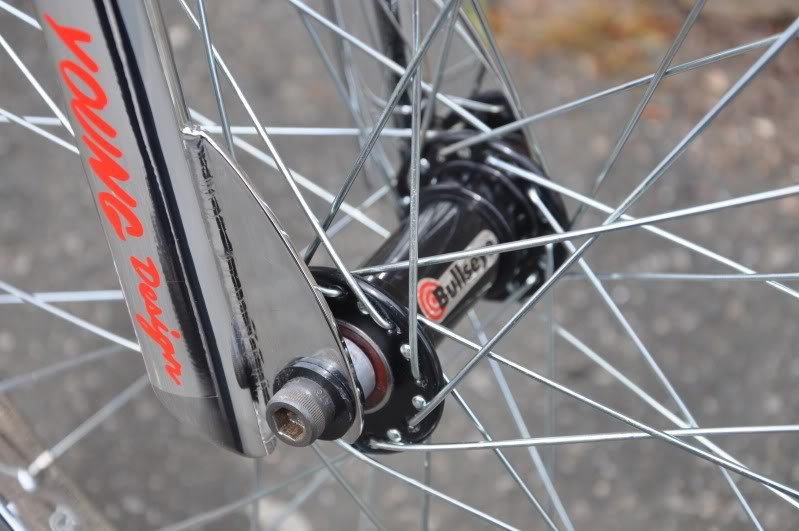
Forks - JMC Darrell Young  - Restored
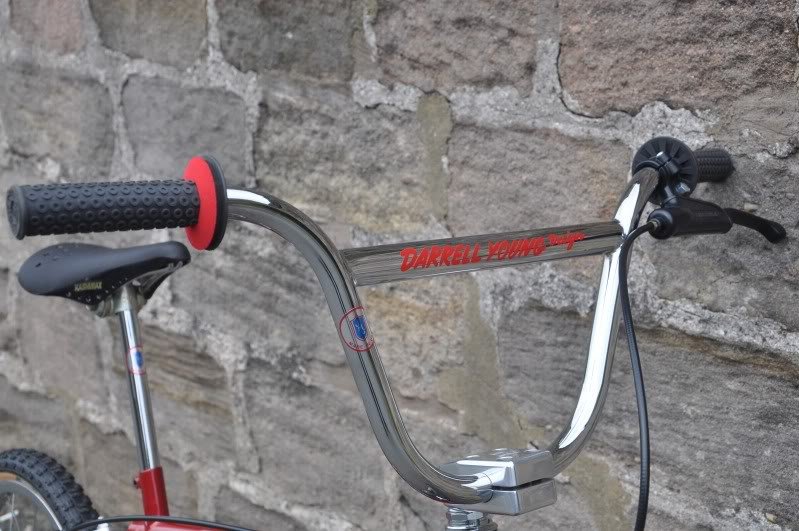
Bars - JMC Darrell Young - Restored
Stem - PROIII/PROFiT - Survivor
Headset - Tiaga Beartrap II - NOS
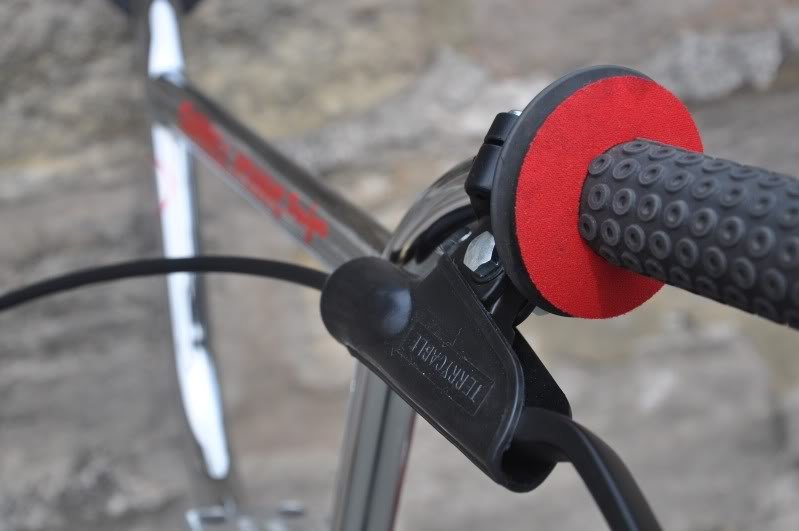
Grips - Oaklay B2 - NOS/SHOWBIKE mounted
Seat - Kashimax MX - NOS/Dyed
Post  - Restored
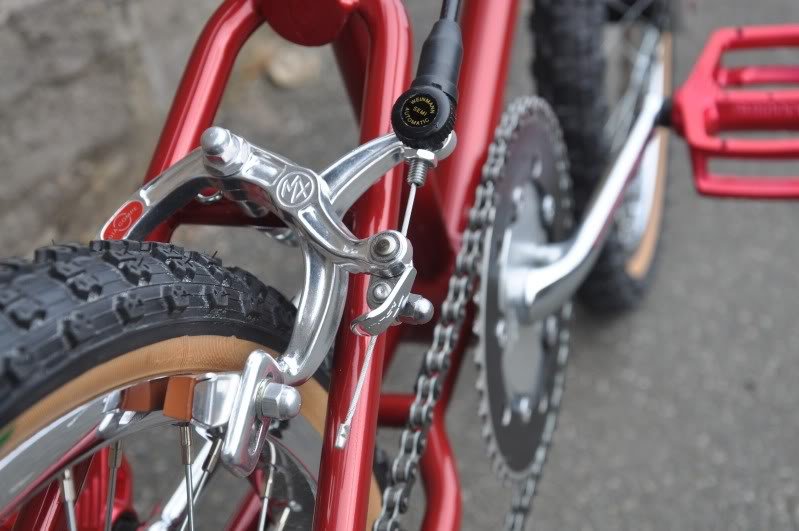
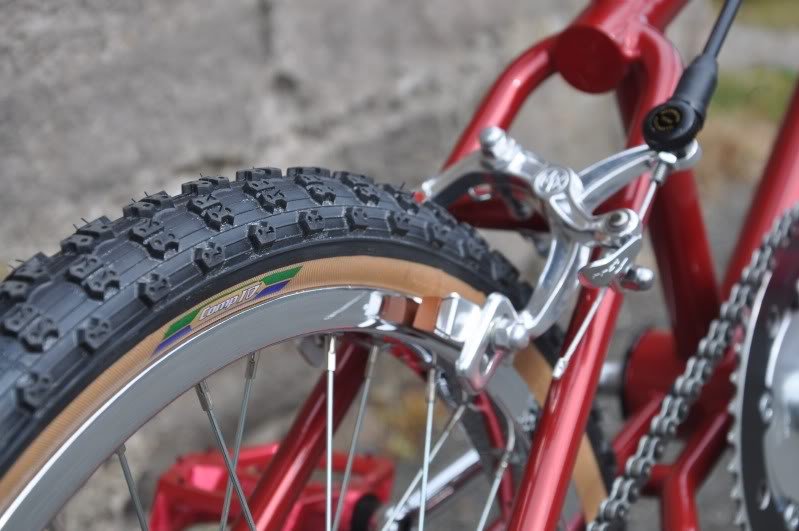
Brake - DC MX1000 - NOS
Lever - Motorbike lever - NOS
Cable - Terrycable - NOS
Hubs - Bullseye - Survivor
Rims - Ukai - Survivor
Tyres - Tioga Comp IV's - NOS
Chain - Izumi - NOS/SHOWBIKE mounted
Freewheel - Shimano -  NOS/SHOWBIKE mounted
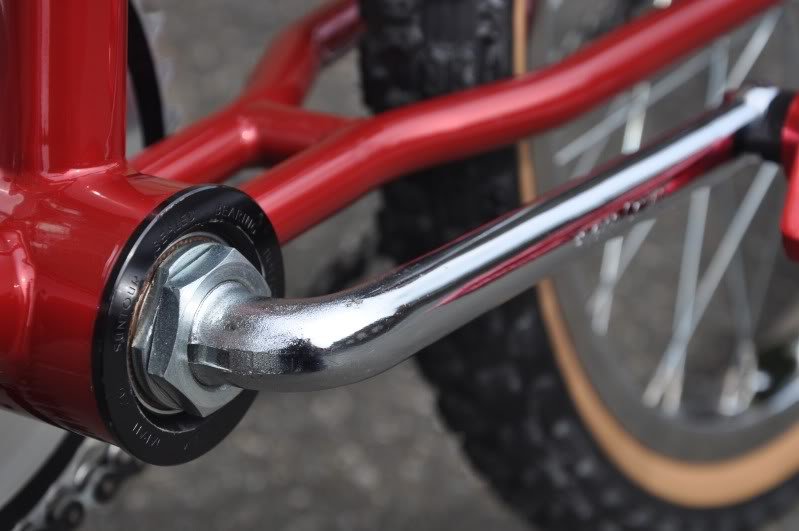
Crank - Sugino 180mm - NOS
Bottom Bracket - Suntour Hadley Type -  NOS/SHOWBIKE mounted
Chainwheel - Pro Neck 44t - Survivor
Power Disc - Tuff Neck - NOS
Pedals - Shimano DX - NOS


A 1pc crank was used to keep the 'simple' look and not distract from the clean lines of the DY frame and after all if a 1pc was good enough for DY himself its good enough for me!

The motorbike lever also adds a bit DY's influence to the build.

I normally like to finish a race bike off with pads and plate but like this without................................ for now!

I should add that this I dont believe that this frame should ever be ridden again as we cant tell how much damage has been done to the insides of tubes durin its time in the cellar. Had to be saved though. Cheers JJ


Big thats to all involved................

Phil Rowles aka 'Sawzal', Johnny Robinson, Trevor @ Midas Touch, Andy Lincoln aka 'Big Plinky', Jai Kemp aka 'SE BMXer, Jim Melton, Jeff Norton, Danny Harris aka 'Harris'.


What next?


From the same cellar..................
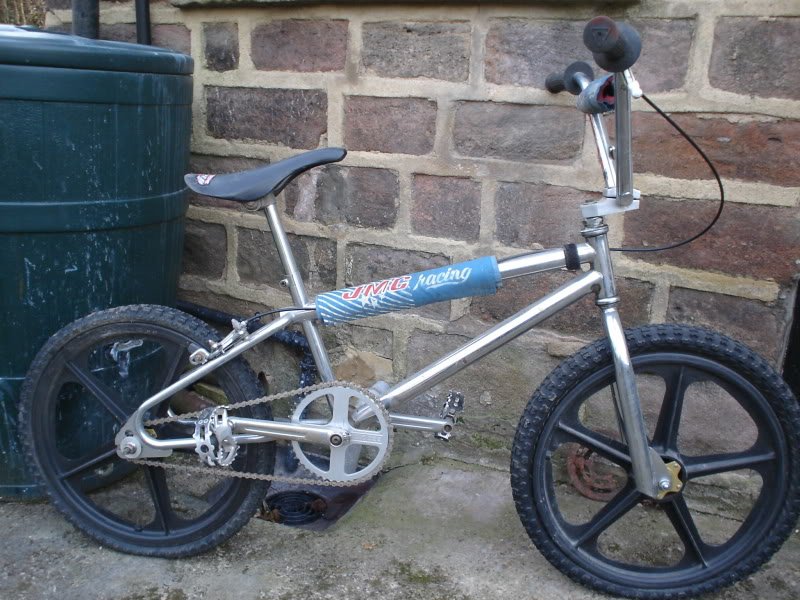


Watch this space!


« Last Edit: May 27, 2010, 05:49 PM by baldbmxer »

Offline double chevron

  • 540 Air
  • *******
  • Posts: 2863
  • Rated:
Re: JMC DY FINALY FINISHED
« Reply #1 on: May 27, 2010, 05:21 PM »
Proper stunner
Very good read that story  :daumenhoch:
Congrats to all involved, what a result

I'm lovin' the OPC and the lever  :angel:

Offline stu27

  • 900 Air
  • ********
  • Posts: 3735
  • Rated:
Re: JMC DY FINALY FINISHED
« Reply #2 on: May 27, 2010, 05:24 PM »
 :smitten: what an awesome build
nice to see the pics and read about the restoration process,hats of to sawzal for his skills with the f&f repairs
negativity is for chumps,positivity is for champs

Offline markyp

  • 900 Air
  • ********
  • Posts: 3744
  • Rated:
Re: JMC DY FINALY FINISHED
« Reply #3 on: May 27, 2010, 05:25 PM »
wow what a story and what a final result!!another bmx saved from the knackers yard,love it :smitten: :smitten:
Arsenal FC not Arsene FC

Victoria Concordia crescit

magna13

  • Guest
Re: JMC DY FINALY FINISHED
« Reply #4 on: May 27, 2010, 05:26 PM »
JJ,

whatta stroy and whatta bike! bloody loving that

the OPC and lever are a lovely added touch, a real difference from the ordinary of Tech 3's & Redline Flights...

hope your going to MK as i'd love to see this baby in the flesh! :4_17_5:

Zak

Offline stevochb

  • Cherry Picker
  • ****
  • Posts: 918
  • Rated:
Re: JMC DY FINALY FINISHED
« Reply #5 on: May 27, 2010, 05:29 PM »
WOW thats a crackin job cant wait to see the next one :daumenhoch:

Offline rooski

  • 540 Air
  • *******
  • Posts: 2616
  • Mons Veneris
  • Rated:
Re: JMC DY FINALY FINISHED
« Reply #6 on: May 27, 2010, 05:36 PM »
thats well nice jj :smitten:
great story and interesting parts,good lad :)
jj,s bmx retirement home must be brimming :D

Bettyswallocks

  • Guest
Re: JMC DY FINALY FINISHED
« Reply #7 on: May 27, 2010, 05:42 PM »
Theres a lot of work gone into that, the end result is lovely...  :smitten:

Is it just the year thats different with the serial numbers 84/85?

Offline Macmania

  • Flip-Whip
  • ******
  • Posts: 2030
  • Rated:
Re: JMC DY FINALY FINISHED
« Reply #8 on: May 27, 2010, 05:42 PM »
Great thread and what a bunch of talented guys  :4_17_5:


Awesome, looks amazing  :smitten:
Wanted: Anything MT Racing

monkian

  • Guest
Re: JMC DY FINALY FINISHED
« Reply #9 on: May 27, 2010, 05:48 PM »
Awesome stuff man. You've really done it justice 8) :daumenhoch:

Offline Kaner

  • Cherry Picker
  • ****
  • Posts: 979
  • Rated:
Re: JMC DY FINALY FINISHED
« Reply #10 on: May 27, 2010, 05:49 PM »
You got the 2nd one out then Jj.   :4_17_5:

Looking forward to seeing this one through its refurb.

How much of the decking had to come up then????   :LolLolLolLol:

baldbmxer

  • Guest
Re: JMC DY FINALY FINISHED
« Reply #11 on: May 27, 2010, 05:51 PM »
Theres a lot of work gone into that, the end result is lovely...  :smitten:

Is it just the year thats different with the serial numbers 84/85?


Hey Betty, The 85' DY doesnt have the gussett tube behind the BB like the 84'  ;)

Offline crazycraig

  • BMX Nerd
  • *********
  • Posts: 4628
  • Rated:
Re: JMC DY FINALY FINISHED
« Reply #12 on: May 27, 2010, 06:06 PM »
Its been a long time coming and worth the wait  :daumenhoch: Its a beut !

Its restos/builds like this that keep me coming back for more  8)
Old School BMX only
Cash is King
Your not famous because you have a BMX so dont expect me to lick your arse for bits !!! I will leave that to the sheep
Jim'll fix it did loads for charity

Offline Darren Wood

  • Curb Endo
  • **
  • Posts: 493
  • Rated:
Re: JMC DY FINALY FINISHED
« Reply #13 on: May 27, 2010, 06:09 PM »
That is one Sweet ride .................... JJ love the little story and pics .................. BB looks  :coolsmiley:


WOODY

Offline sawzall

  • 540 Air
  • *******
  • Posts: 2793
  • Rated:
Re: JMC DY FINALY FINISHED
« Reply #14 on: May 27, 2010, 06:10 PM »
WOW jj that looks stunning,great choice of parts too :daumenhoch:
seeing it finished make all the struggles with the frame worth while :daumenhoch:
British race frames and race clothing wanted

daz bmx it!

  • Guest
Re: JMC DY FINALY FINISHED
« Reply #15 on: May 27, 2010, 06:14 PM »
Superb work allround :daumenhoch: thats a belter! JJ  :4_17_5:

Offline JAY

  • Site Supporter
  • Cherry Picker
  • *
  • Posts: 1117
  • Rated:
Re: JMC DY FINALY FINISHED
« Reply #16 on: May 27, 2010, 06:19 PM »
Great repair Phil, beautiful build and great story JJ. :4_17_5:

Where did you say that cellar was......... :D

Offline HUTCHMAN

  • 540 Air
  • *******
  • Posts: 2928
  • Rated:
Re: JMC DY FINALY FINISHED
« Reply #17 on: May 27, 2010, 06:27 PM »
great resto story,stunning bit of work from all concerned. One question JJ, was it sprayed as opposed to powder? do you know the colour code? this has really spurned me on to get my D.Y sorted.

trasher

  • Guest
Re: JMC DY FINALY FINISHED
« Reply #18 on: May 27, 2010, 06:55 PM »
awesome work all round ,,,great results and a real stunner  :4_17_5:

Offline superbikedan

  • BMX Legend
  • 900 Air
  • *
  • Posts: 3819
  • Rated:
Re: JMC DY FINALY FINISHED
« Reply #19 on: May 27, 2010, 07:06 PM »
that is absolutly amazing jj,  10 out of 10 :daumenhoch:
For powder coating drop me a pm

Offline Jt

  • 900 Air
  • ********
  • Posts: 3275
  • Rated:
Re: JMC DY FINALY FINISHED
« Reply #20 on: May 27, 2010, 07:10 PM »
really really really really mint.

really.

could do with a straight bar decal though... ;D

makes me think i should set about doing mine again.

good when you see something that gives you the horn and gets you wanting to do something again yourself.

top marks :daumenhoch:


Offline brettypeeps

  • Team Admin / Mechanic
  • My life is Radbmx
  • *
  • Posts: I am a geek!!
    • Bretts Bikes
  • Rated:
Re: JMC DY FINALY FINISHED
« Reply #21 on: May 27, 2010, 07:22 PM »
Great restoration dude. You must be made up with it :daumenhoch:

Offline bobafett

  • Team Mechanic
  • Tail Whip
  • *
  • Posts: 5694
  • mongoose addict
  • Rated:
Re: JMC DY FINALY FINISHED
« Reply #22 on: May 27, 2010, 07:35 PM »

Great resto story, great build - nice one  :daumenhoch:

mongoositis - an expensive disease......

Offline Muffski

  • Flip-Whip
  • ******
  • Posts: 1815
  • Rated:
Re: JMC DY FINALY FINISHED
« Reply #23 on: May 27, 2010, 07:41 PM »
Top marks  :daumenhoch: ,Great resto job all round :coolsmiley:

Offline Peter J

  • BMX Nerd
  • *********
  • Posts: 4993
  • I have issues
    • http://www.sumoservices.com/
  • Rated:
Re: JMC DY FINALY FINISHED
« Reply #24 on: May 27, 2010, 07:45 PM »
Loving the 0PC

And thats got to be one of the best cellars in the UK......now where did you say it was  ::)

Fantastic Resto  :4_17_5:
I might actually build a bike this year instead of just hoarding parts :)

RADBMX.CO.UK  |  Technical & Reference Section  |  Tech and Restoration  |  JMC DY FINALY FINISHED
 

gfxgfx
gfx gfx
Powered by MySQL Powered by PHP Valid XHTML 1.0! Valid CSS!
SimplePortal 2.3.5 © 2008-2012, SimplePortal